Adobe PDF Resizing Not Working? Try PDF Compressor
Getting frustrated with Adobe PDF resizing not working? Nothing can be more frustrating than working hard on a PDF presentation only to realize that it is too big to send to your client or boss. Sometimes even after using the standard compression options, the output file size might still end up being way over the required email size limit.Luckily, there are ways to get around this issue while preserving its quality. PDF Compressor is one such versatile tool that helps you to compress large PDFs to compact sizes. It also comes with a very clean interface that anyone can pick up within a few minutes. Quick, easy, effective and most importantly, no more worrying about Adobe Acrobat PDF resizing not working!
What is PDF Compressor?
Like what Adobe Acrobat PDF compressing function does, PDF Compressor is a useful utility software program based on Windows that helps to compress not only text PDF files but also scanned ones into a highly compact form. Moreover, the entire process is streamlined and highly user friendly so that it doesn't require you to be proficient in software programs to do it. Anyone can use it with ease.
What are the Benefits of Using PDF Compressor?
It offers numerous benefits. Here are some of them.
1) Reduce File Size - With a high compression rate of 10 percent, you can reduce a 40 MB PDF down to 4 MB or less.
2) Batch Mode Support - You can reduce hundreds of PDF documents one after the other with ease.
3) Save Utility - It allows you to save your compressed PDFs to the same folder without overwriting the original file. You can also save them to a different folder as per your preference.
4) Remove Restrictions - If you want to remove restrictions on protected files, you can do that easily in no time at all.
What are the Different Options in PDF Compressor?
The PDF Compressor offers several useful options for reducing the size of the file as well as where and how you can save them.
1) Compress Quality Slider - This option is available for both scanned PDFs and text PDFs as it pertains to the overall compression rate you want to achieve. The higher the compression rate, the smaller the final output will be but the quality may get affected. As you drag the slider, you will see that there are 4 options such as "Best Quality", "High Quality", "Standard" or "Smallest File size". By default, the slider will be in the middle, which is the "Standard" option.
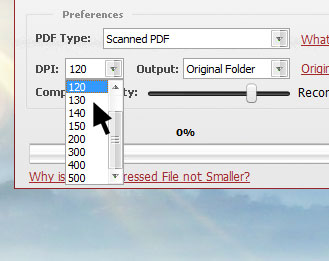
2) DPI - This pertains to the quality of the final output. You can choose up to a maximum of 500 DPI through its drop-down menu which will offer the highest level quality. This option is useful when you want everything on the document to be extra legible and crisp. However, DPI only can be customized for scanned PDFs. It cannot be used for text PDFs.
3) Original Folder Option - This allows you to save the output file in the same location as the original file.
4) Customize - If you want to save the compressed file elsewhere, you can choose the "Customize" option and select the preferred path.
5) Overwrite Original - This overwrites the output file on top of the original one. However, it would be wise to be careful before you choose this option as you won't be able to undo it later.
How to Compress PDF Files in PDF Compressor?
Here is a step by step guide on how to use the PDF Compressor.
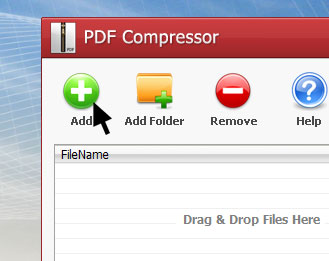
1) First, you need to add the required file by clicking on the plus button at the top left part of the interface.
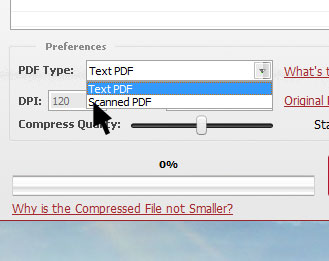
2) Then choose the correct file type from the drop-down menu near the bottom. If the file you want to compress is a Text PDF, then select the same in the drop-down menu. If it is a "Scanned PDF" where you can't copy the text, choose the other option.
3) If you chose a scanned PDF, then you need to set the "Compress Quality Slider" and the "DPI" value accordingly to either go for better quality or higher compression ratio.
4) If you chose a Text PDF, then you just have to set the "Compress Quality Slider" to the desired level. The DPI option is unavailable for Text PDFs. You can choose from 4 different compression quality modes to get the desired file size.
5) Once the parameters are set to the desired levels, you have to choose the preferred output path. To do that, click on the "Output" drop-down menu and select one of the 3 options; "Original Folder", "Customize" or "Overwrite Original".
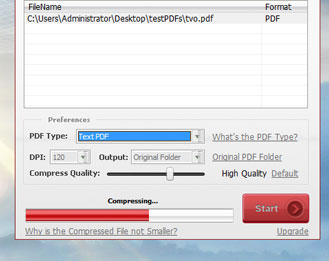
6) Then proceed to click on the "Start" button on the bottom right of the interface and the compression will begin. You can track the progress by looking at the progress bar at the bottom. Once it's done, it will be saved in the folder you chose earlier.
And that's it! So shed your worries about Adobe PDF program doesn't work. It won't be a problem anymore.